How do I reduce a photo to the correct size? In this article, we’ll show you how easy it is to do this with a free Windows program.
High resolution photos are of high quality, however, they are completely unsuitable for web applications – for example, for posting or sending by e-mail, due to the large size. Some photos taken in RAW or JPG format from modern digital cameras or SLR cameras can take up to 20-30 megabytes of memory. In this case, it is worth reducing the photo accordingly without losing quality.
How to reduce the size of a photo without losing quality?
In our tutorial, you will learn how to reduce not only the resolution, but the quality and size of photos, using a free program. You can also reduce the size of the photo if needed.
So, to reduce the size of your photo, first download FastStone Photo Resizer . This program offers really rich functions related to image modification.
After installing the program, you can go straight to the action.
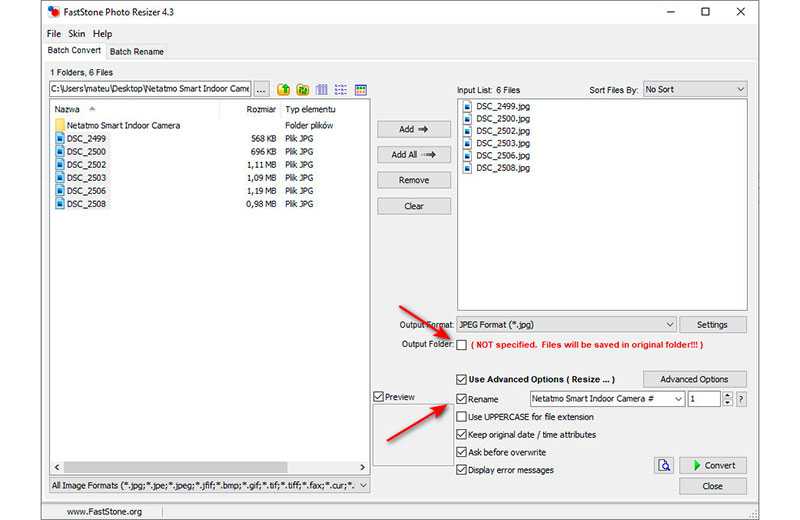
Select photos to compress – from the main window on the left go to the folder where your photos are stored.
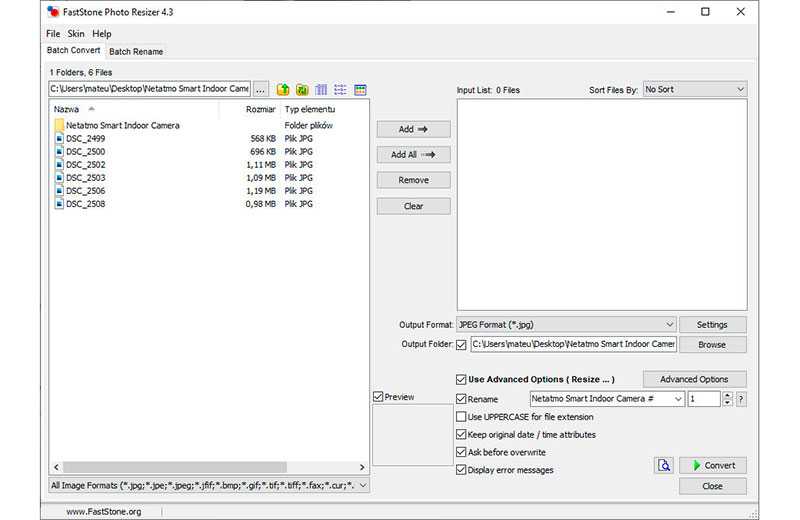
Select the photos you want to change. You can select them with your mouse and use the “Add” button. If you want to add all the photos from a folder, just select Add All.
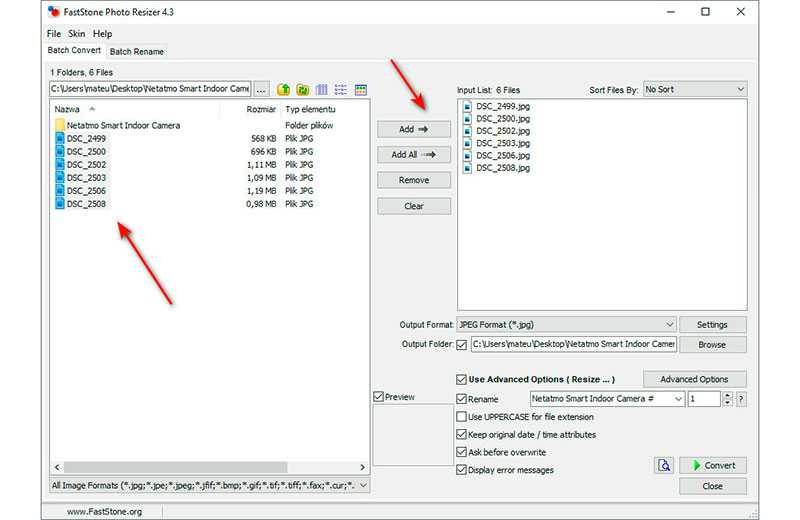
Want to reduce the resolution of your photo? Go to advanced settings. Select and click :- “Use advanced options ( Resize ..)”. Options will appear in a new window, select the first tab – “Resize”.
Here you can choose how much to reduce the photo. If you want your photos to have a specific pixel size, use the last option, Resize Based on One Side.
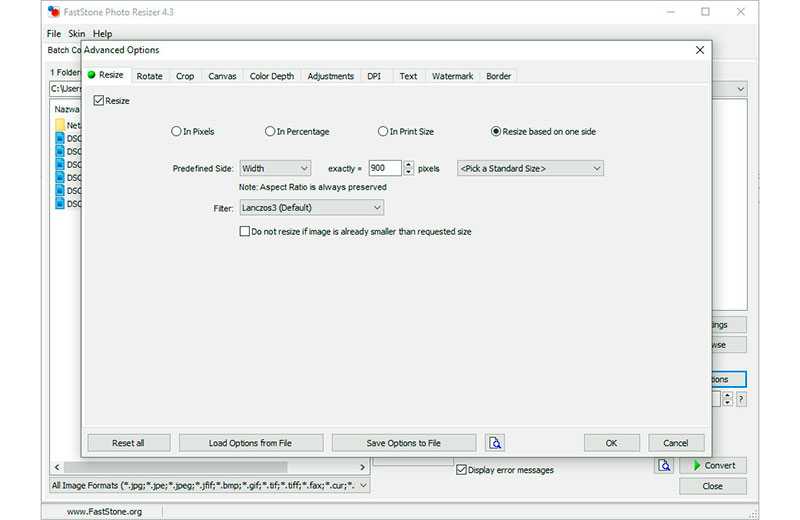
For example, setting the Width value to 900 pixels means that the resulting images will have a fixed width of 900 pixels, and the height will be adjusted proportionally. After selecting the required settings, click OK.
Let’s go back to the main window of the program. If you want to rename all converted photos, check the Rename checkbox. By placing a check mark in the “Output folder” field, you can specify in which folder the new photos should be saved (it is advisable to create a new one).
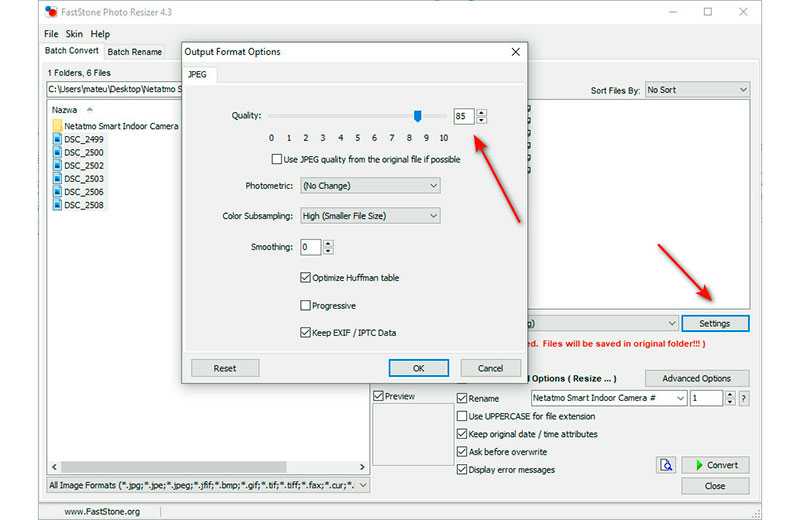
Before saving, you should also adjust the quality, here you can reduce the quality of the photo. To do this, go to “Settings” and select the appropriate value. However, in order to reduce the photo without losing quality, I advise you not to set the value less than 85%.
The last step is to click the “Convert” button.
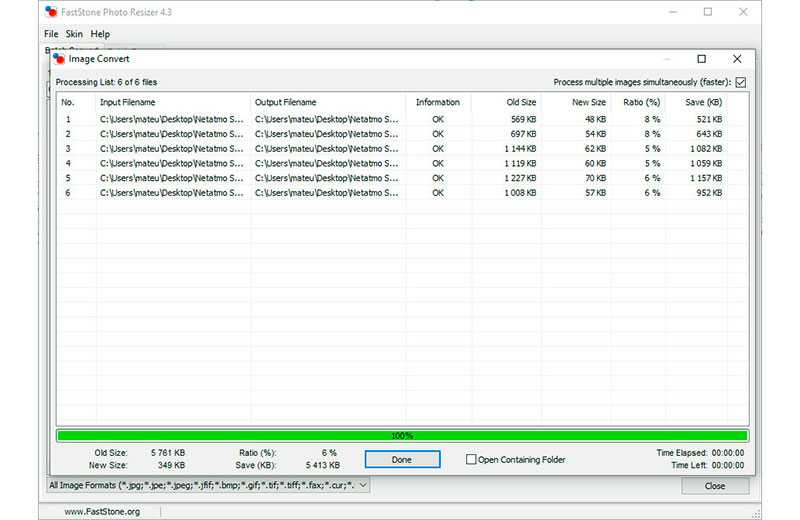
As you can see, we were able to quickly and easily reduce the size of the photo file by converting it in FastStone Photo Resizer.

